{First of all, I would just like to express my frustration (over myself) for not having saved my supposed to be original post for this. How I wish I could still recover that but I guess it’s already in oblivion. What’s up WordPress?} 😦
It’s a happy day anyway 🙂
Good morning! It’s the start of March and it’s supposed to be hot because it’s a summer head-start but it seems kind of the unusual. The weather outside is gloomy and cold, not really humid. Hot or cold, humid or dry, I’m just glad that it doesn’t affect what I’m doing – decorating with Royal Icing 🙂 Last night, I was able to continue decorating my sugar cookies. It’s only during evenings after work that I get to experiment in the kitchen, and so…

Embellished Sugar Cookies
These are the products of my doing last night 🙂
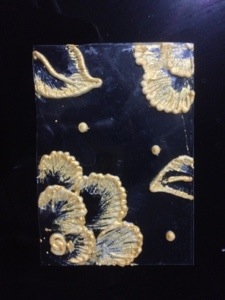
{Forgive me for the dark capture – I made these at night time, working on my “camera” skills}
The way it was decorated is called Brush Embroidery. Special thanks to Amber Spiegel of SweetAmbs who inspired me a lot to do such way of decorating. It was mid-last year when I first dropped by her YouTube Channel and saw some of her cookie decorating tutorials. I was so amazed and willing to try. Thank God that yesterday I was able to. You should check out Amber’s tutorial videos on her YouTube channel. She offers free video (and instructional) tutorials – oh, and some are paid.
BTW, her videos are love 🙂 Even if you don’t try her tutorials, by just watching her videos is truly stress-relieving. She has background instrumentals from Mozart, Beethoven and so on… Sometimes I leave it on play while I’m working in the office.
Okay.
Without further ado – off to decorating cookies! The other night, I baked cookies from the “excess” dough that I have in the fridge. These are re-rolled scraps but I was hopeful I could still use them for decorating, even if, maybe I couldn’t get as nice cookies as the first batch. I was able to cut a few circles from the dough. I had the baked cookies kept in a container for 24 hours because the butter/grease from the freshly-baked cookies could seep onto the Royal Icing of the cookies and could leave you splotches or spots. I am no scientist speaking but it happened to me. Also, thanks to Marian of Sweetopia for the tip! See here. I also used the excess Royal Icing that I still have from the weekend.
Moving on… I had my Royal Icing colored mint for the base 🙂 I allowed it to completely dry for, well, supposed to be just overnight but due to work – almost 24 hours, before decorating. For the petal outline, I used a stiff, white Royal Icing with a Piping Tip #2 (I use Wilton). I have a 10-second RI on hand and I just added a little powdered sugar and beat with a paddle attachment for a stiff consistency. I simply piped the outline in a zigzag motion, one petal after the other. Okay, look who’s talking “simply.” I’m not a pro and I actually had trouble at first. I really didn’t pipe in a zigzag well. I need more practice. And my royal icing clogs in the piping tip. I was inserting a cake tester in the opening most of the time and since it continues to clog, I switched to a #3 piping tip instead and clogging got a little less 🙂 There are lots of troubleshooting for clogged tips. I just got so excited I could care less. Here are some tipsfrom Sweetopia in case it’s a fuss. For the smaller details, I used a damp paintbrush and gently brushed the outline downwards. I did the same thing to the leaves and just piped a few small dot details just like Amber did.
Nothing’s really uniform. A flower here, one there and a leaf… I also had one cookie with the leaf as the main attraction.

Drying the stiff Royal Icing Embellishment only took a few minutes…
1, 2, 3…
Until it was time to paint the details with gold luster dust :)Some spell it “lustre”).
I have been using a lot of gold luster dust lately and I’m really loving it. The one I’m using is a D’Chef brand. I am not sure if it’s a local brand (I think it is) but it’s one of the least expensive luster dusts in our area. It’s not my first preference but it works fine. And being a fan now, sooner or later, a set of colored dusts would be on a shelf in my kitchen. To use luster dust for painting, you only need to drop a few, well, “drops” of either alcohol or lemon/vanilla extract over a teaspoonful of luster dust powder in a small bowl. I use alcohol such as Vodka and sometimes, Gin (haha). A teaspoon goes a long way for painting. If the mixture gets dry (it does if not used for a while), just add a few more drops and mix well.
I simply painted the outlines…


‘Til everything’s dry.


and Voila.
So that is how a weekday of mine went. I am hopeful that one day, I’ll be able to also post tutorials the way Marian and Amber does.
Here are a few pictures of the embroideries I practiced doing the other night. A little practice helped me decorate better on the actual cookies!

Happy decorating!
Ciao,
Jay.
